The V badge on the back of a Cadillac CTS-V is not supposed to sit parallel to the bumper. Also, remember that the letter leans. Okay, so it’s in a stylized font and attached to an angular car and will always look crooked from some perspective. But if the V badge on the rear of our long-term CTS-V Sport Wagon is improperly installed—and the accusations are already flying—it’s my fault.
When Cadillac agreed to lend us a CTS-V wagon as a long-term test car, we could hardly wait to get our hands on it. Cadillac builds the CTS in all its forms at the Grand River assembly plant in Lansing, Michigan, an hour or so from our Ann Arbor headquarters, so it turns out we had less of a wait than we expected. On the morning our long-termer was built, we clocked in to help put it together.
First Shift
Just past 7 a.m., our silver wagon entered the factory, fresh from the paint shop. The doors, the hood, and the rear hatch departed for the upper floor of the factory, where they would wait in a holding pattern until the final stages of assembly. Down on the main floor, we ceremonially signed our car’s birth certificate, planted a Save the Manuals! sticker where it would soon be covered up, and signed the adjacent sheetmetal. Sedans, coupes, wagons, and their V versions are intermixed on the line, and our car slotted in between two pedestrian CTS four-doors. We saw this as symbolic of the V wagon’s sleeper nature but found it encouraging that, on this day, Grand River also bolted together seven other V wagons. We’re imagining the club meetings and are already fond of the other members.
For you readers who have never been inside an automobile factory, it’s an amazing sight. Heck, even those of us who have seen modern assembly lines continue to marvel at them. In Lansing Grand River, as in most factories, the body shell never stops moving as people and robots swarm about it at each stage of assembly, descending on the car for a moment and then dropping back to repeat their task on the next one. As they do so, the car steadily accumulates the bits and pieces that transform it from something that needs transportation down the line to a provider of same on the road. Rarely does real life so closely resemble time-lapse video. (Speaking of, check out time-lapse video of our build.)

|
Few individual tasks look particularly challenging, but the dexterity required to do most in the time allotted is significant. The difficulty is compounded by the fact that many are performed on a moving target—the line only stops if someone is working too slowly and fails to complete his or her job before the car moves out of the area. For some tasks, the workers stand on the same moving platform as the car. For others, they duck in and out as the car moves past.
Harder Than It Looks…
For example, one of the tasks to which your author was assigned was wheel installation. I was initially disappointed to be handling this task. I’ve installed plenty of wheels in my life and had hoped to do something a bit more technical. But it’s not as easy as it sounds. Heck, it’s not even as easy as it looks—which isn’t particularly easy. In short, the procedure is as follows: mount wheel (on moving car), start lug nuts with a small impact wrench, torque all five lug nuts at once with a giant five-headed torque wrench. Total time per wheel: about 20 seconds. We watch a worker mount wheels to a few cars, and then we take over.

|
As each car enters the wheel-installation zone, we grab a handful of lug nuts from a bin behind us and the correct wheel rolls down onto a carrier. Throughout the assembly process, we encountered rigs like this carrier. They are robotized to offset the weight of the pieces they help maneuver, but they still require a person to move them into position. The operator—in this case, me—gives the carrier a gentle nudge, and it rises to the approximate height of the wheel hub. Then all you have to do is position it at the exact height, rotate the wheel to align it with the hub, and slide it into place. Keep in mind that we have to hit a moving target.
Once the wheel is in place, we grab an impact wrench and zap two lug nuts onto the wheel—just enough to hold it in place. Then the press of a button sends the carrier back to receive the next wheel. We use the impact wrench to get the remaining three lugs started and then drop it back into its holster and grab the torquing tool. Resembling a massive Gatling cannon that would give even Predator’s Blain Cooper an inferiority complex, this five-barreled tool is suspended from above.
…a Lot Harder

As we said, it torques all five lug nuts at once. At least, it would torque all five lugs at once, if only we could use it properly. Like the wheel carrier, most of the torque monster’s weight is robotically offset, but aligning its five sockets with the lugs is still tricky. Remaining parallel to the moving car and rotating the tool to align its five fingers with the five lugs are our responsibilities, but a pair of switches controls its movement toward and away from the car.
When we think we have it lined up, we press a switch, and the rig advances toward the wheel. We don’t have it lined up, though, and the barrels crash into the wheel next to the lugs—thank goodness the sockets are coated to prevent the wheels from scratches. We depress the other switch, and the apparatus retreats from the car. We tweak our alignment, press the switch, and it crashes again into the wheel. Retreat. Repeat. We’re almost there, and a jiggle of the rig slides the sockets over the lugs. Press another switch, and the lugs are torqued. We retract the device from the wheel with the retreat switch and jump back to the wheel carrier to start the rear wheel just before the torquing rig passes over a line painted on the floor. Total time: probably closer to a minute; I was too frantic to count. Fail to torque the wheel by the time the rig crosses the mark painted on the floor, and, again, the whole line stops while you finish your job. How’s that for motivation?

|
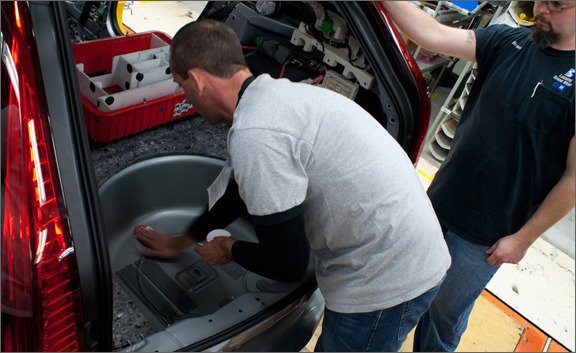
Other tasks proved similarly hectic. If the fuel tank should drop out from underneath our Cadillac, it also will be your author’s fault. If the right-front suspension assembly lets go or the back seat is crooked, road-test editor Mike Sutton will be to blame. And if the driveshaft falls off or the rocker panels aren’t secured and blow off during high-speed testing, technical editor K.C. Colwell is going to catch hell.
Although we are winded and sweating after performing these tasks on just a few cars, none of the workers seems particularly rushed. The ease with which they perform their tasks is truly impressive, and the necessary dexterity finely honed. We depart the factory after our shift, tremendously impressed with the people who allowed us to get in their way.

|
Done Already? Now What?
We also depart the factory earlier than you might expect. For our CTS to go from bare body shell to completed car took fewer than five hours. Add in a few systems’ checks, and the total time from entering the factory as a bare, freshly painted shell to departing on the transporter was hardly five-and-a-half hours. Not that I needed them—because it isn’t crooked—but I guess I could have taken a few more seconds to ensure that the V badge was straight.

|
View Photos
View Photos